Usually I never think to photograph anything till I've more or less finished it, but as I've had some queries as to how I do things, here's a series of process photos.
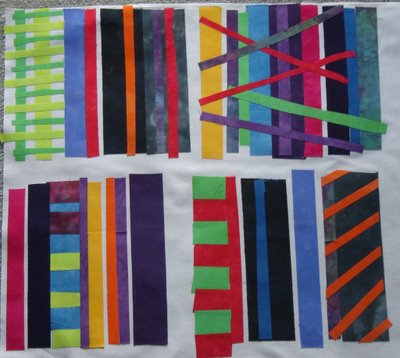
I started with fusing strips of various widths, mainly horizontally but with some vertical and diagonal bits too, onto a white background. I almost never work with white, but wanted it in this piece to add additional contrast to the other strong colours. You'll see that there are 4 sets of strips.
Here are the strips chopped into their 4 sets. I've now fused Vliesofix (Wonder Under) to these pieces.
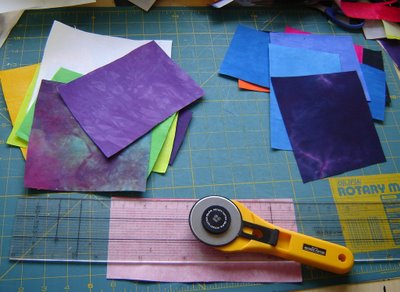
I'm using the same colours from the strips for the background, so that parts of the strips can merge into them. Note that I rotary cut the background pieces - while there's no need for them to be perfect squares or rectangles, the sides must be straight - no scissors cuts allowed.

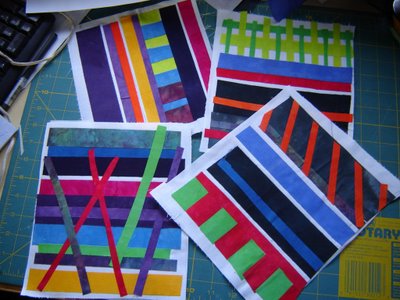
Here I've started randomly chopping bits from the strip sets to make stripey pieces (very technical term) that form the snakes and ladders. OK, these look like snakes, but the stripes make them ladders as well.

 I started with fusing strips of various widths, mainly horizontally but with some vertical and diagonal bits too, onto a white background. I almost never work with white, but wanted it in this piece to add additional contrast to the other strong colours. You'll see that there are 4 sets of strips.
 Here are the strips chopped into their 4 sets. I've now fused Vliesofix (Wonder Under) to these pieces.
 I'm using the same colours from the strips for the background, so that parts of the strips can merge into them. Note that I rotary cut the background pieces - while there's no need for them to be perfect squares or rectangles, the sides must be straight - no scissors cuts allowed.
 Here I've started randomly chopping bits from the strip sets to make stripey pieces (very technical term) that form the snakes and ladders. OK, these look like snakes, but the stripes make them ladders as well.
2 comments:
I wonder why you said the edges of the background pieces have to be straight - is this because you can't piece them otherwise, or some self imposed 'rule' for this design? if it is the frist, technical, reason, you know you CAN have non-straight seam lines without buckling - if you are wondering how, we can correspond on this, or you can go to a download on my website, on irregular shaped piecing....should tell you all you need to know, the rest is practice, practice, practice and planning the manouevres... I love your Snakes and Ladders quilt.
Entirely my own "rule", Alison. It's not irregular shapes that I don't like, it's an unevenly cut edge that LOOKS like it was just hacked off a bigerg piece. Hence the straight edges.
Post a Comment